Small Laundry Room Declutter Project Reveal
We gave you some teasers and now it’s time to finally reveal Ms. P’s laundry room project!!! I am so excited to show this to you mainly because Ms. P is very dear to me and I enjoyed seeing her excitement with the final results. I will warn you that this post is very photo-heavy, but I wanted you to see the entire process so you could see that it is possible for you to accomplish this same result with me or on your own.
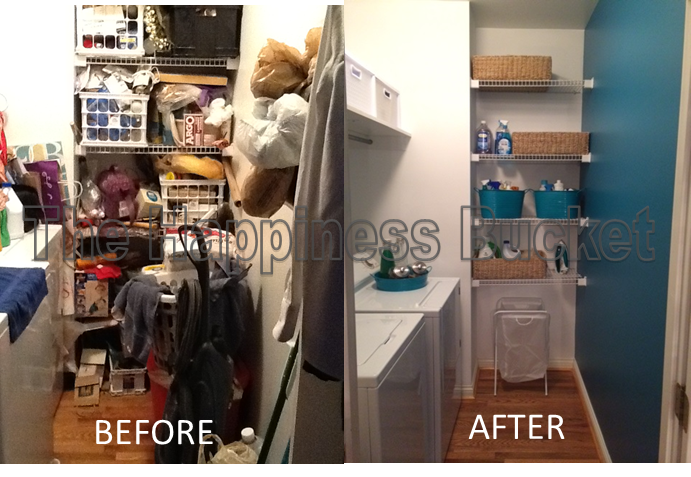
Project Background
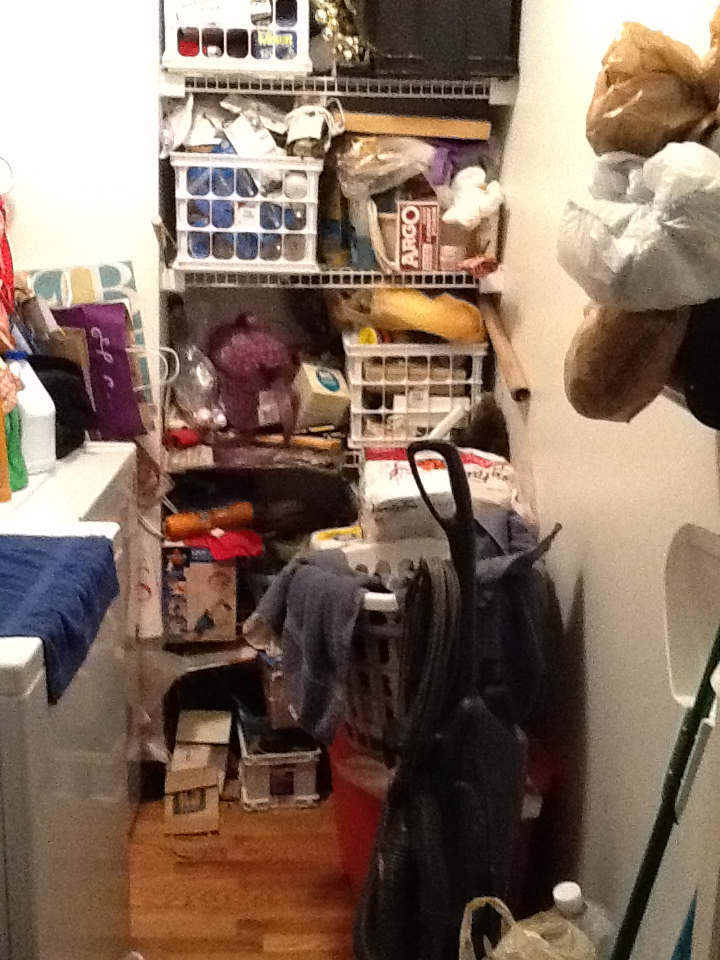
Ms. P was extremely eager and ready to start the process of decluttering her space(s). For many many years, she had been storing items she used for her various hobbies in this space as she had deemed it to be “her room”.
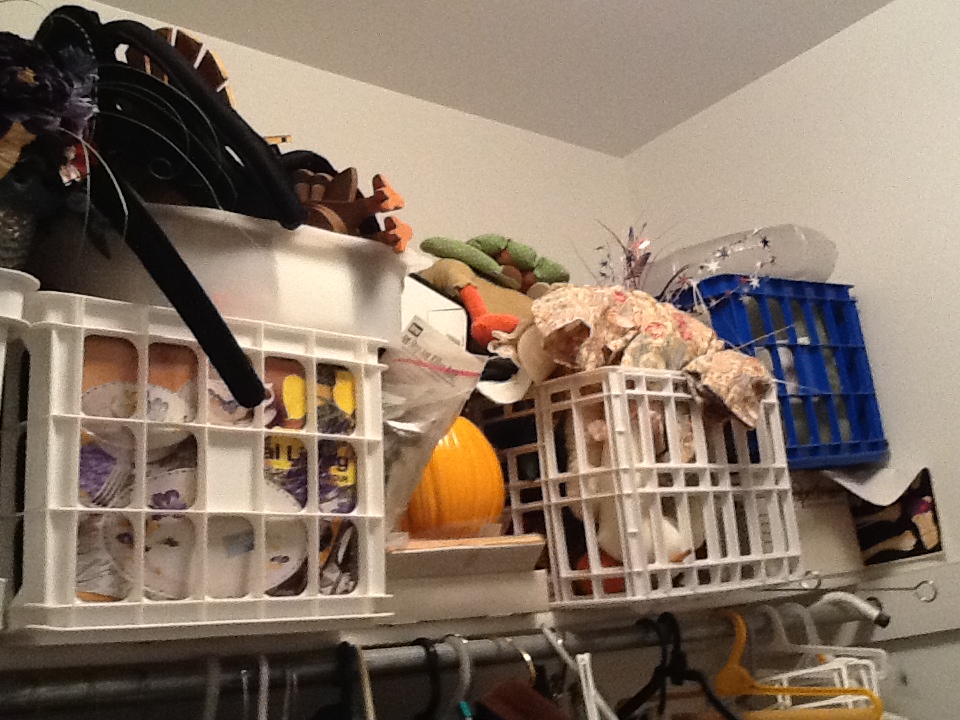
She would store various tools and items in this space as well because she could never find what she needed in her husband’s supply and she also stored seasonal items here as well.
Determining Our Project Goals
To begin this project, I asked her to complete a short questionnaire so I could fully understand her overall goal and budget for the project. It also gave me a window into what she wanted that she didn’t know how to verbalize.
From her answers, I determined that we would provide consultation, sorting, management and decoration/restocking services for her project. I also determined that she wanted this space to be functional, to store her seasonal and craft items, cleaning and laundry supplies and she wanted it to be pretty.
So…now that you know the background and goals for the space, let’s look at a few before photos:
Clearing the Space
The first step in the process was to empty the space. THB believes that you can easily get carried away with the history of an item or your connection to an item if you start trying to declutter at this point. We suggest that you first just set a goal of emptying the laundry room. This gives you a clear beginning and ending to the task at hand. We also find that a lot of projects are not one-day projects. Most people have a few hours at a time to work on the space, so by sorting first it allows you to have a clear idea of where you left off and you can continue to function/work in the space while it is under transition. Most people also have similar items in different places so sorting helps you see all of what you have instead of small snippets.
To sort Ms. P’s space, we had bins set up in a staging area (which was Ms. P’s eat-in kitchen area) and designated each for a specific category of items. If you do not have spare bins handy get a few empty paper boxes from work or a local store. You just need a clean container that can hold all the belongings in a specific category. In some situations, I just make piles on the floor, but this assumes your staging area is large.
Two of us from THB handled Ms. P’s overall sorting process and it took us approximately two hours to complete.
Decluttering, Repairing, Cleaning and Painting the Space
Once Ms. P’s space was cleared we noted that the shelving needed to be repaired. We didn’t feel it would be safe for her to continue to stack items on these shelves as they were separating from the wall and weren’t level.
After getting her approval, we contracted someone to come in and handle the repairs, to add an extra shelf over her washer and dryer, which extended the shelf depth from 12 to approx 24 inches, as well as painting the space that beautiful Teal color that Ms. P selected. Isn’t it just fabulous?!?!?!
When Ms. P came home, she was greeted with this wonderful empty and painted space. She also came home to a little homework. She was charged with going through each of the piles/categories and decluttering the items that were no longer needed.
She handled her homework like a champ and got the various piles down to the bare necessities. Now, we didn’t leave Ms. P all on her own, we gave her our recommended items to return to the space and gave suggestions as to where the other items should go. She was great!!!
She took all of our suggestions and also decluttered her booty off! We were so very proud of her and this reiterated the fact that she was ready to move on to the next stage of the game…the fun part of decorating and organizing!!!!
Laundry Room Final Reveal
We met with Ms. P to get her thoughts now that she could see the space coming together. We wanted to get her ideas for the space and to make sure we were all speaking the same language.
See, Ms. P. was leaving again to care for her Grandson and we wanted to have another big reveal for her when she returned. How fun is that?!?!? Well, we were able to find all the items that we used in her space on sale at various local retailers.
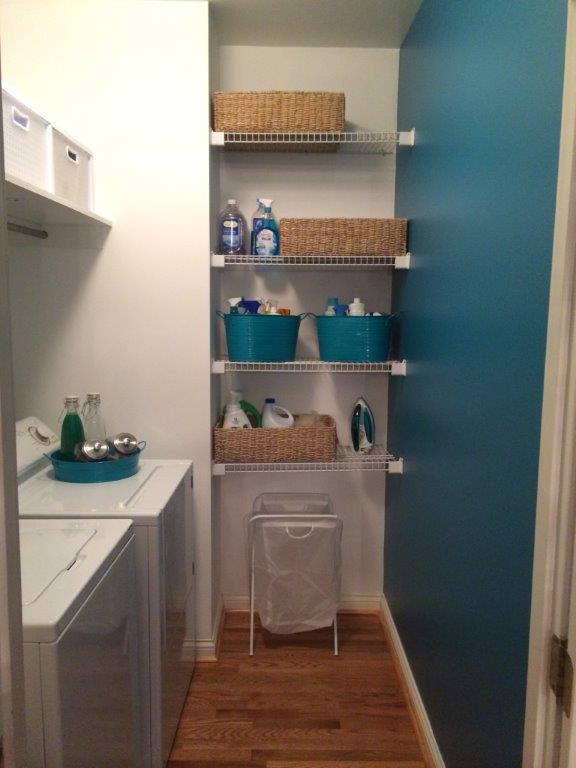
This proves that you don’t have to break the bank to make a space pretty and organized. So here you go, Ms. P's laundry room after!
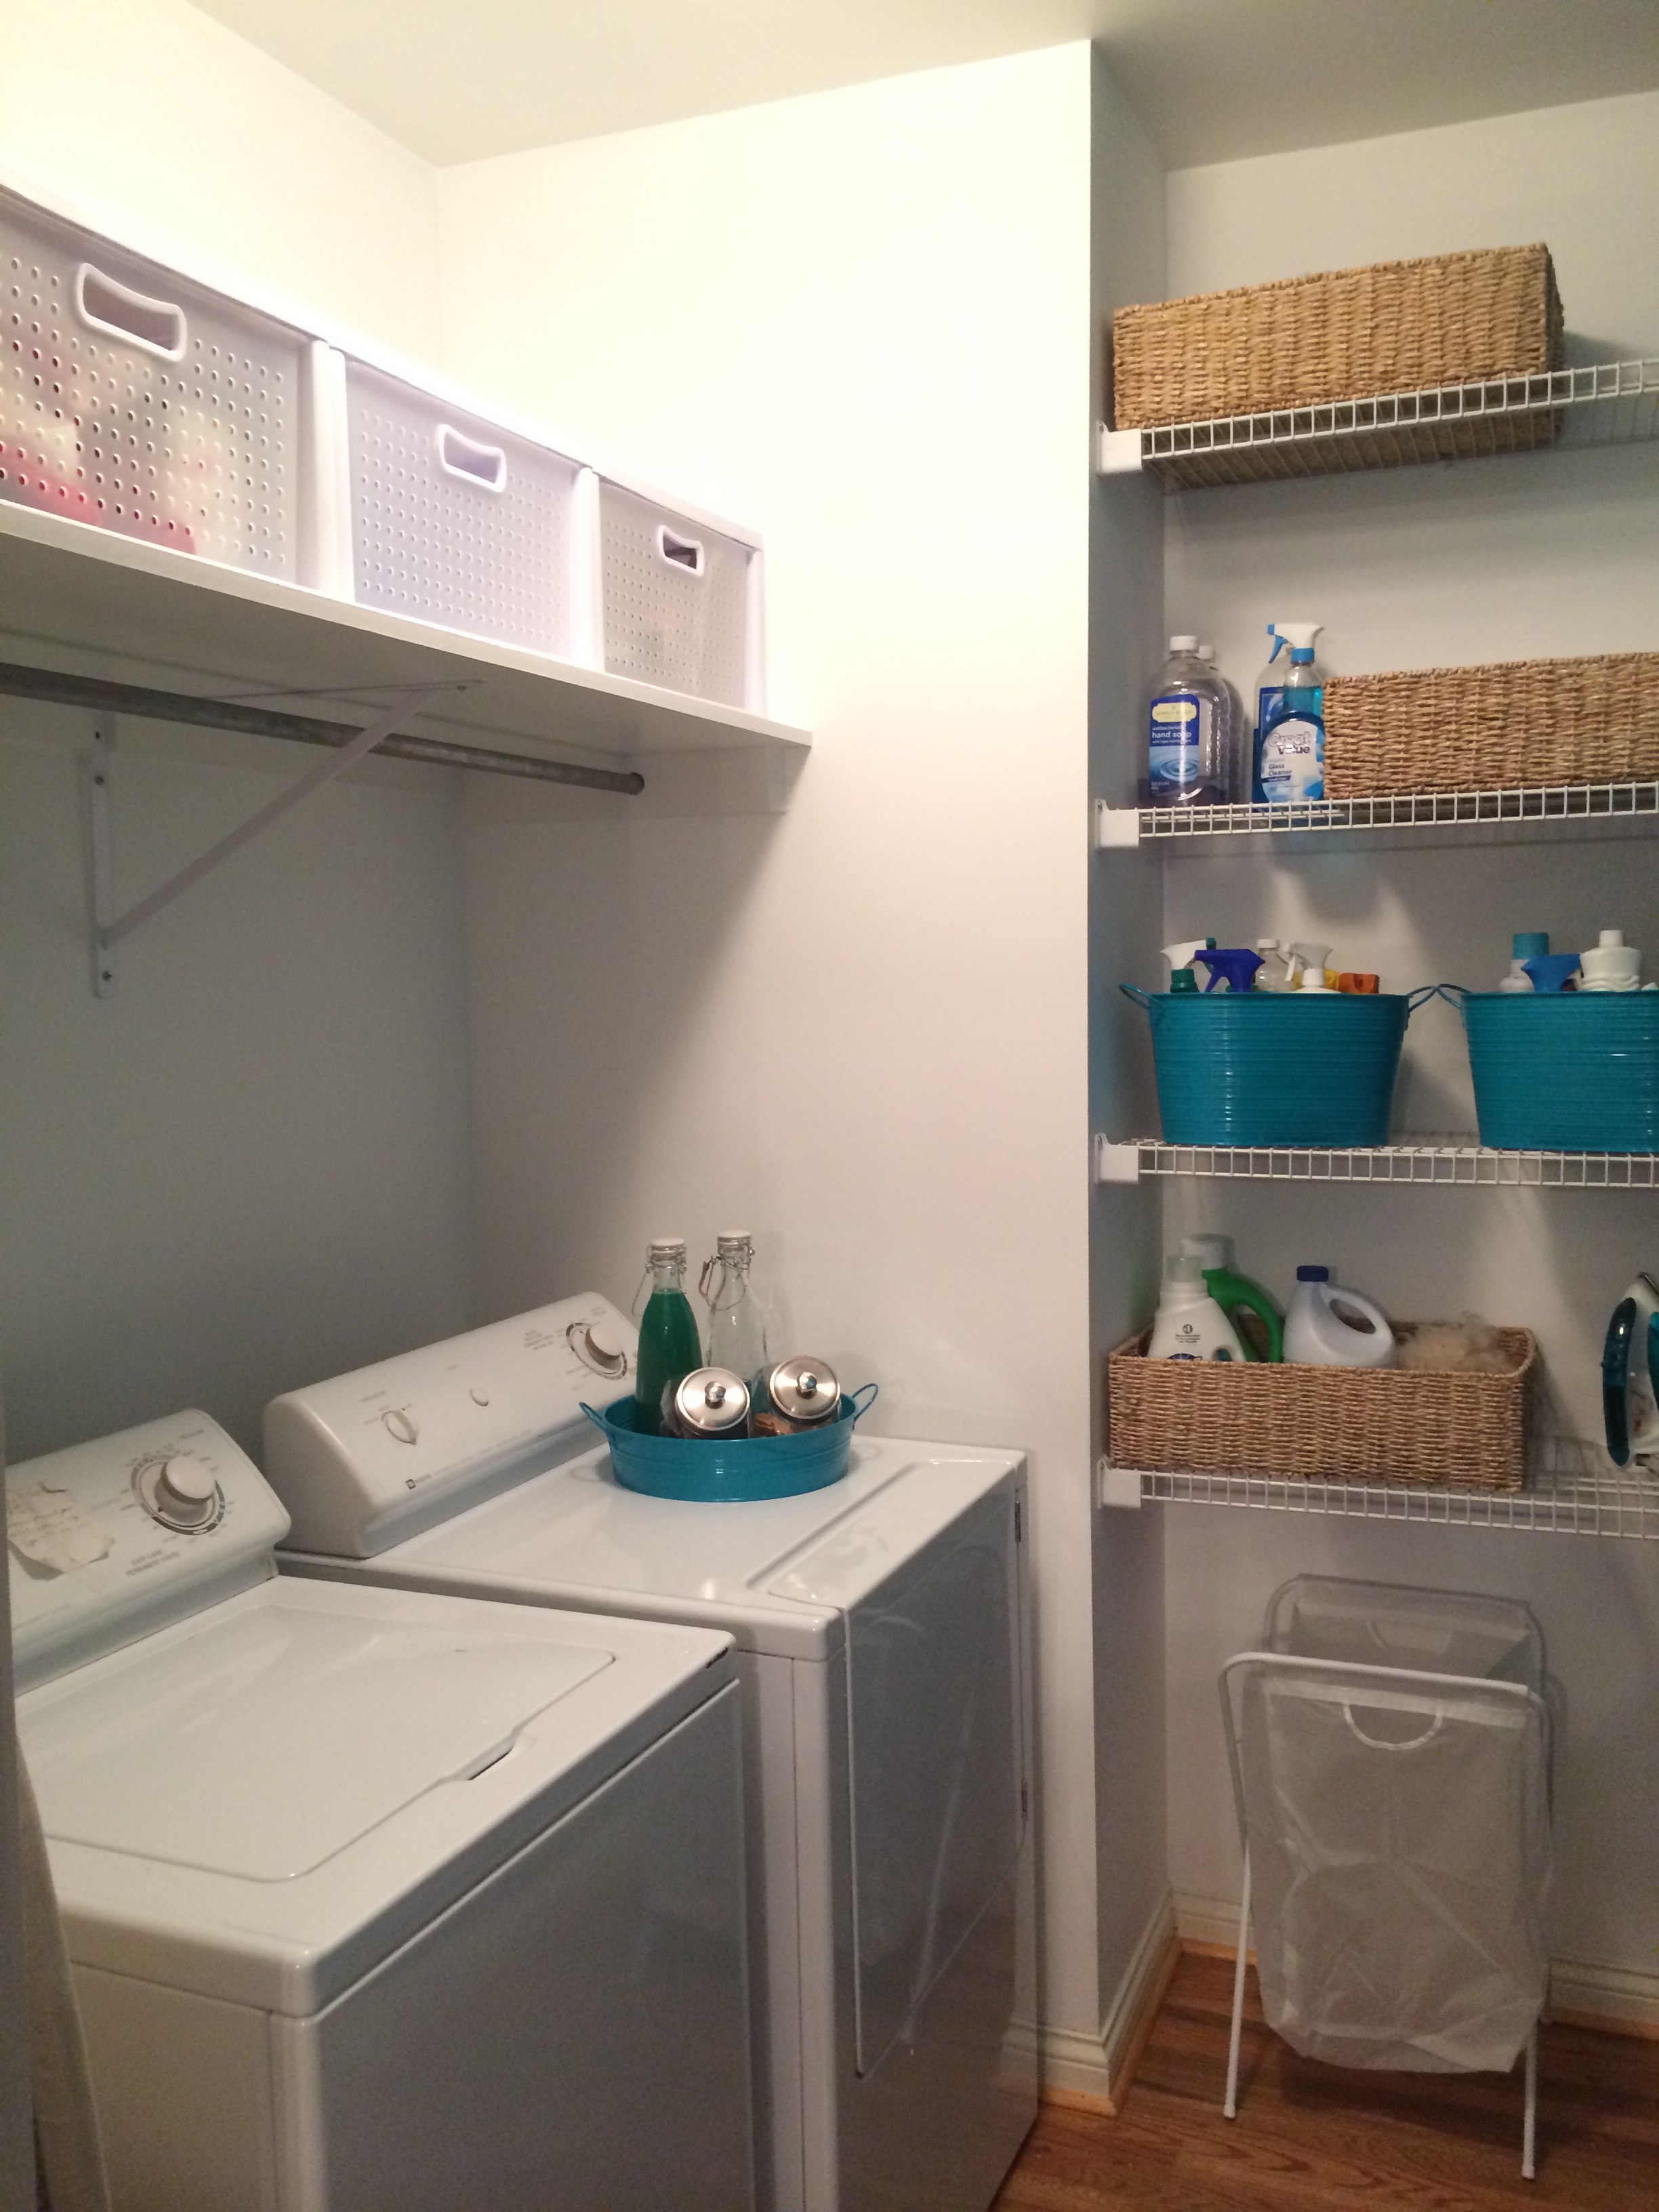
We purchased three drawer bins to add to this space so Ms. P could easily access the items in the space and can remove the drawer to do something somewhere else in the house and then can return the drawer easily. It also helped to give her a space limit for specific items.
We like to use containers to help give you space requirements for your items. Once the space is full you have to declutter what is in it. We also gave her three baskets, which are really under the bed baskets which could help conceal the less appealing items.
We added two teal metal bins that can do double duty but are mainly used to hold her floor cleaning and furniture cleaning supplies. Simple changes that had a huge impact. One key thing to note is that Ms. P did such a wonderful job that many of the storage items we provided for her are empty and she still has space above the drawers for storage.
We are so happy that Ms. P loved her space!!!! We hope you have enjoyed our journey in pictures! (Note: She has added some photos to the teal wall and we will also add labels to the various containers too.) Check out our other project with her. See Ms. P's Art Studio Project.
Are you ready to take the next step in your organizing process? Arrange your discovery session with me today!
Streamlining Your Digital World - My Guest Appearance on Got Clutter? Get Organized!
Unlocking Canva's Potential: Expert Organizing Tips for Free and Pro Users
Comments Click here to add your comment/question